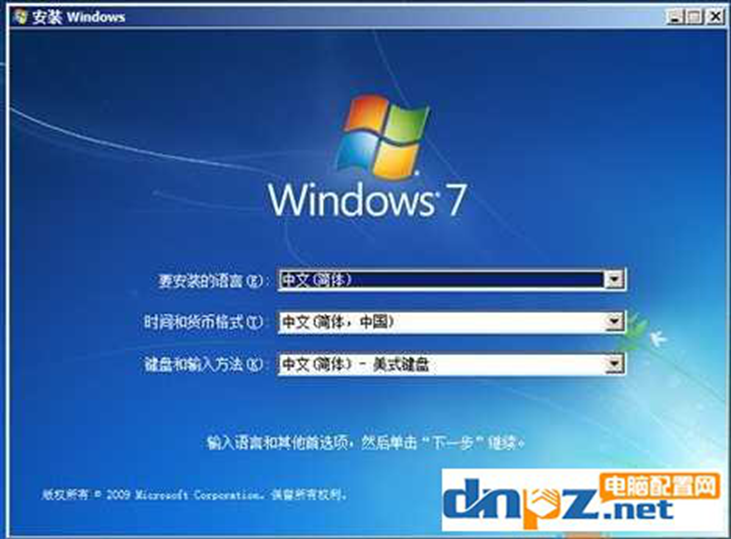
J3160 and N3160 series chips only have USB3.0 natively. How to install Win7 system? Since the Win7 system does not include a USB3.0 driver, if your mouse and keyboard are also USB interfaces, you will encounter a situation where the mouse cannot move during the installation process and the installation process cannot continue. Even after the installation is completed, it is very difficult to drive USB3.0. It's laborious, and you need to find a PS/2 keyboard and mouse to complete it. In response to this problem, I specifically consulted the information, and I will share with you the specific methods of installing ghost win7 and original win7.
First Install GHOST Win7 system on USB3.0 computer
If you want to install ghost win7 on a native usb3.0 computer, the system disk must have a usb3.0 driver.
1. Download the system disk with USB3.0 driver:
[With USB3.0 driver] WIN7 64-bit Ultimate System (new model)
2. If it is reinstallation, then it is simple. Just run "hard disk installation.exe" on the hard disk after decompressing the system and reinstall as usual.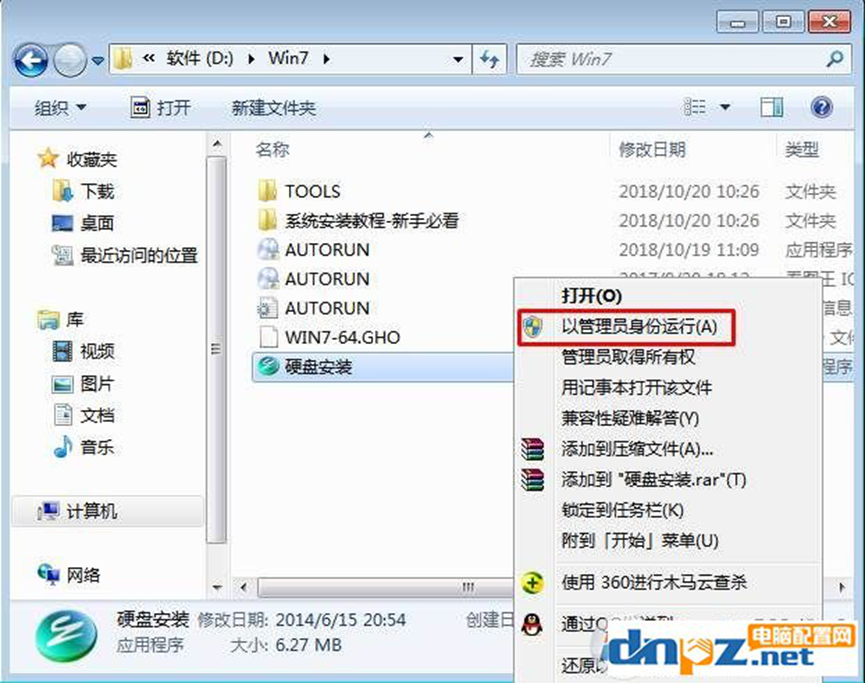
3. Then make sure the GHOST image path is correct, select the C drive (the partition where you want to install the system), and click OK.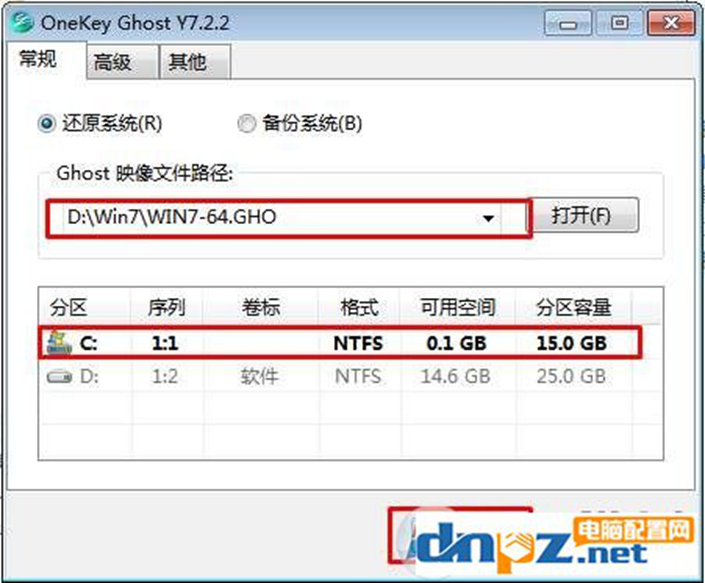
4. If you need a U disk installation, make a U disk boot disk that supports USB3.0, and then put the system in the U disk.
5. Insert the U disk into the computer, select the U disk to boot, and select USB HDD to recognize the U disk and boot into PE.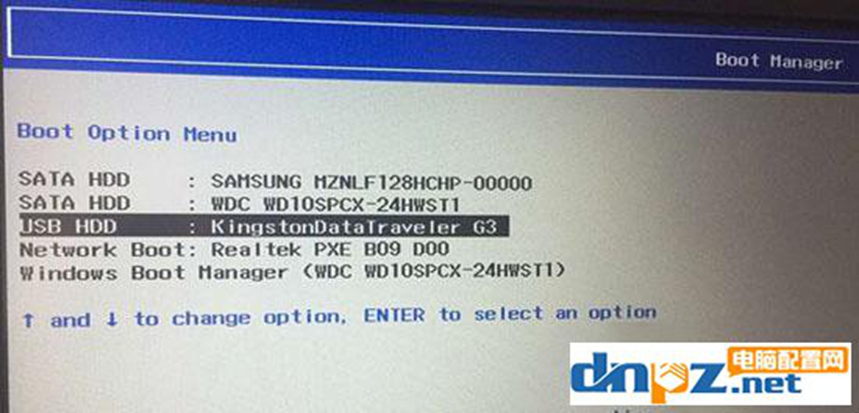
6. After entering Pe, run one-click installation to start and complete the installation unattended.
Second Install Win7 original version on USB3.0 computer
The same Win7 installation version also needs to inject the USB3.0 driver. Since the steps are more troublesome, the editor has prepared them here:
1. Download the Win7 Ultimate 64-bit installation version ISO image download (integrated USB3.0 driver + NVMe hard drive).
2. Then insert the USB disk into the computer and open the UltraISO software. Click on the file to open the Win7 CD image ISO file you downloaded, as shown below.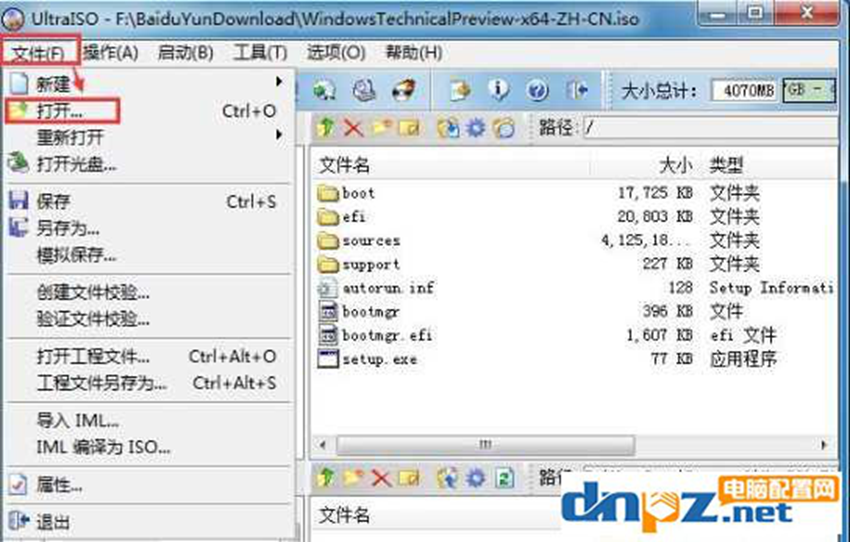
3. After opening the ISO file, click "Start" on the toolbar, and then select "Write Hard Disk Image".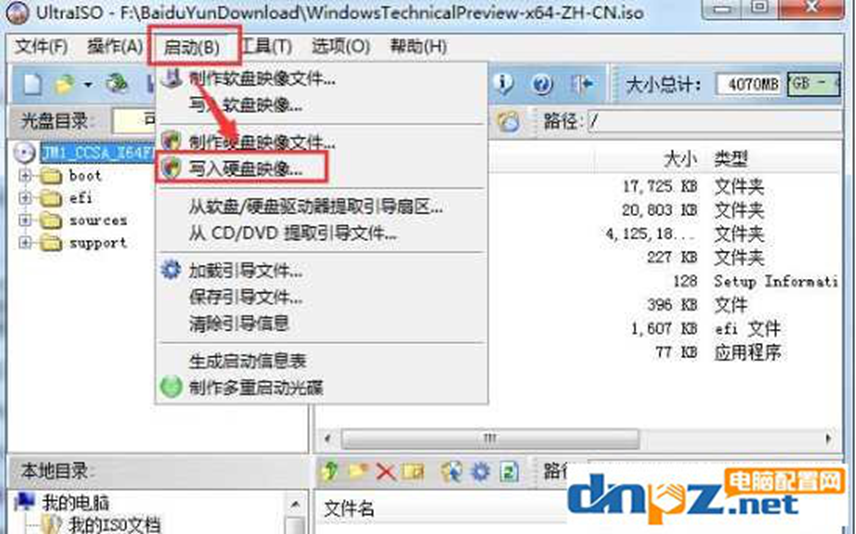
4. At this time, the "Write Hard Disk Image" window will pop up. After confirming that the disk drive is your USB flash drive, click Write. A formatting prompt will pop up in the middle. We just need to confirm it once.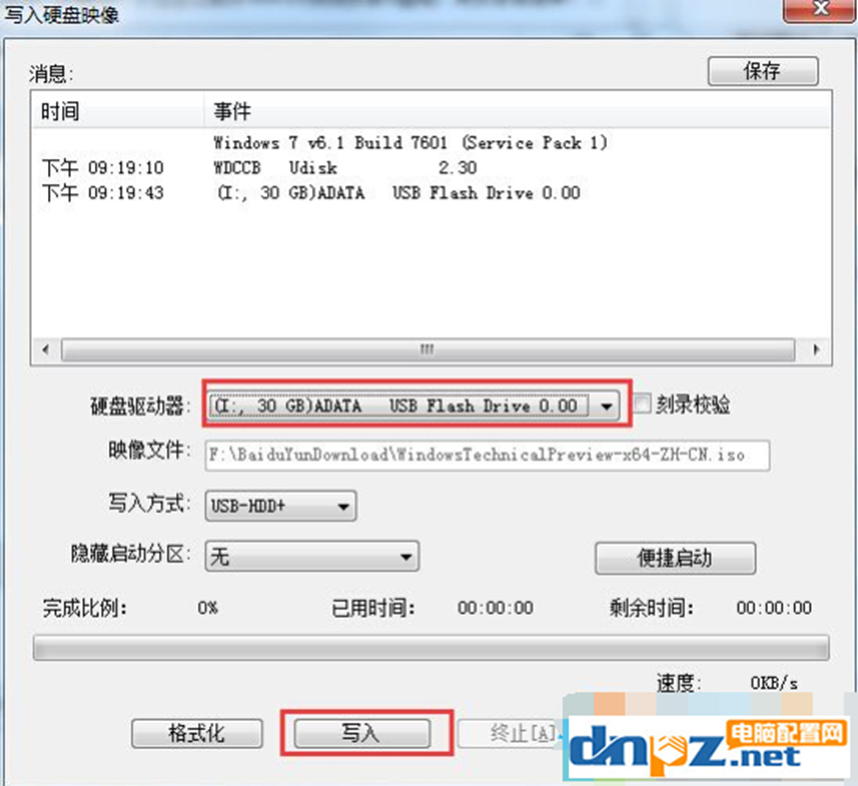
5. Wait for writing to 100%, OK and then exit the UltraISO software. At this point, the Win7 U disk installation disk has been created, and you can start the installation operation.